Coco plum plants are unique and fascinating additions to any garden. In order to successfully grow and care for these plants, it’s important to understand the key aspects of their cultivation. From selecting the right location to harvesting the delicious coco plums, there are several key takeaways to keep in mind.
Key Takeaways
- Choose a sunny location with well-draining soil for your coco plum plant.
- Maintain a regular watering schedule to keep the plant healthy and thriving.
- Prune your coco plum plant regularly to promote growth and fruit production.
- Follow a fertilizing schedule to provide essential nutrients for the plant’s development.
- Implement pest control measures to protect your coco plum plant from common pests.
Getting Started with Coco Plum Plant

Choosing the Right Location
Finding the perfect spot for your Coco Plum plant is crucial for its growth and fruit production. Choose carefully positioned areas in your garden that receive ample sunlight and have good air circulation. Coco Plums thrive in warm climates, making them ideal for places like Florida.
When considering the location, keep in mind the mature size of the plant to avoid overcrowding. Here’s a quick checklist to ensure you’ve got the right spot:
- Full to partial sunlight exposure
- Protection from strong winds
- Sufficient space for growth
- Easy access for watering and maintenance
Remember, a well-chosen location means less stress on the plant and a better chance for it to flourish and produce those delicious plums you’re looking forward to!
Selecting the Ideal Soil
When it comes to planting your Coco Plum, the soil you choose is a make-or-break factor for its growth. The ideal soil for Coco Plum plants is well-draining and rich in organic matter. This ensures that your plant gets the right balance of moisture and nutrients. A mix of sandy soil with compost or peat moss can create the perfect home for your Coco Plums to thrive.
To get the soil composition just right, consider the following mixture:
- 2 parts sandy soil
- 1 part compost
- 1 part peat moss or perlite
This blend not only provides excellent drainage but also keeps the roots oxygenated, which is crucial for the health of your plant. Remember, Coco Plum plants don’t like to sit in waterlogged soil, so drainage is key. If you’re looking to enhance your landscaping, incorporating decorative rocks around the plant can aid in water management and add an aesthetic appeal.
While Coco Plums are not as demanding as some other plants, they do share some similarities with Clusia plants, which are also popular in warm climates like South Florida. Both types of plants benefit from soil that supports their growth while being resistant to common issues like pests and diseases.
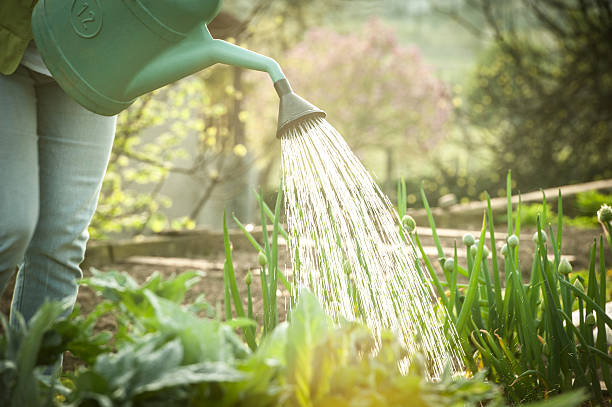
Watering Tips
Getting the watering right for your Coco Plum plant is crucial for its growth and fruit production. Water deeply but infrequently to encourage strong root development. Over-watering can be just as harmful as under-watering, so it’s important to strike the right balance.
Here’s a quick guide to help you out:
- Spring & Summer: Water once a week if there’s no rain.
- Fall & Winter: Reduce watering to every two weeks, or when the soil feels dry to the touch.
Remember, Coco Plum plants are somewhat drought-tolerant once established, but they’ll need consistent moisture during the first growing season. Use well-draining soil, rich in organic matter like coco coir, to prevent waterlogging. This will mimic the plant’s natural environment and promote healthy growth.
Caring for Your Coco Plum Plant

Pruning Techniques
Pruning your Coco Plum plant is essential for promoting healthy growth and maximizing fruit production. Pruning should be done carefully to avoid damaging the plant. Start by removing any dead or diseased branches to prevent the spread of disease. Then, focus on thinning out overcrowded areas to ensure adequate air circulation and sunlight penetration.
When it comes to shaping your Coco Plum, heading back is a great technique. This involves selectively pruning the tips of branches to encourage branching and denser growth. It’s particularly useful in areas where you want to stimulate more fruit production. Remember, the goal is to create a balanced structure that supports the weight of the fruit without straining the branches.
Here’s a quick checklist for your pruning session:
- Inspect the plant for dead or diseased branches.
- Remove any branches that cross or rub against each other.
- Thin out dense areas to improve light and air flow.
- Use heading back to promote new growth where desired.
By following these steps, you’ll ensure your Coco Plum plant remains healthy and productive for years to come.
Fertilizing Schedule
Getting the fertilizing schedule right for your Coco Plum Plant is crucial for its growth and fruit production. Fertilize your plant in late winter or early spring, just before the new growth starts. This timing ensures that the nutrients are available when the plant needs them the most for developing lush foliage and, eventually, delicious fruits.
When it comes to the type of fertilizer, a balanced 10-10-10 formula works well. However, if you’re looking for a more organic approach, compost or well-rotted manure can be excellent alternatives. Here’s a simple schedule to follow:
- Late Winter/Early Spring: Apply a balanced fertilizer or compost.
- Mid-Summer: Add a light application of compost around the base of the plant to encourage continued growth.
- Fall: If your plant is still young and establishing itself, consider another light application of compost to support root development over the winter.
Remember, over-fertilizing can be just as harmful as under-fertilizing. Regular cleaning around the plant base and checking for leaks in your irrigation system can prevent nutrient runoff and ensure your Coco Plum Plant gets just the right amount of feed.
Pest Control Measures
After you’ve got the hang of watering and fertilizing your Coco Plum plant, it’s time to turn your attention to keeping those pesky pests at bay. Regular inspections are key to early detection and control of any unwanted visitors. Just like you’d prep in advance for a fun and safe party, you should also prepare your plant care routine to include pest management.
Here’s a quick list of common pests to watch out for and how to deal with them:
- Aphids: A strong blast of water or insecticidal soap can do the trick.
- Mealybugs: Wipe them off with a cotton swab dipped in alcohol.
- Spider mites: Increase humidity around your plants or use miticides if necessary.
Remember, the best defense is a good offense. By maintaining hygiene and considering food safety guidelines, you can draw parallels to plant care by keeping your Coco Plum in top shape. Regular cleaning of fallen leaves and proper maintenance of the soil can prevent many issues before they start, much like preventing discoloration and damage to tiles by cleaning grout effectively.
Harvesting Coco Plums

Ripe Fruit Indicators
Knowing when your coco plums are ripe for the picking is crucial for enjoying their unique flavor. Look for a deep purple hue and a slight give when gently squeezed; these are telltale signs that your fruit is ready. It’s also important to note the size of the fruit, as coco plums reach their peak sweetness when they are about the size of a large cherry.
Here’s a quick checklist to help you identify ripe coco plums:
- Deep purple color
- Slight softness to the touch
- Size comparable to a large cherry
- A subtle, sweet fragrance
Remember, patience is key. If picked too early, the fruit may be tart and less flavorful. Conversely, waiting too long could result in overripe fruit that’s less ideal for consumption. Keep a close eye on your coco plum plant as the fruit matures, and you’ll be rewarded with the perfect harvest.
Harvesting Tools
Once you’ve identified your ripe coco plums, it’s time to gather them with the right tools. Choosing the appropriate harvesting tool is crucial to ensure you don’t damage the fruit or the plant. For coco plums, a simple hand-picking method is often sufficient for small-scale harvesting. However, for those hard-to-reach fruits, a fruit picker tool can be a game-changer.
For larger trees, consider using a fruit picker with an extendable pole. This tool allows you to safely reach higher branches without the need for a ladder. The COCONUT Fruit Picker Tool is a popular choice among gardeners. It’s versatile and can support a variety of fruits, from plums to mangoes, making it a valuable addition to your gardening arsenal.
If you’re dealing with a more extensive orchard or want to speed up the harvesting process, specialized tools like the Olive Rake can be adapted for coco plums. These tools are designed to efficiently strip fruits from the branches, which can be particularly helpful when harvesting larger quantities. Remember, the key is to handle the fruits gently to prevent bruising.
Here’s a quick list of tools you might consider:
- Hand gloves for protection
- Fruit picker with basket and pole
- Olive Rake (for larger harvests)
- Garden scissors (for snipping stems)
Always clean and maintain your tools after use to keep them in good condition for the next harvest season.
Storing Coco Plums
Once you’ve harvested your coco plums, it’s important to store them properly to maintain their freshness. Keep your coco plums in a cool, dry place to extend their shelf life. The refrigerator is an ideal spot, especially if you’re not planning to eat them right away.
For those who enjoy a bit of kitchen organization, consider using stylish countertop organizers or vintage pieces to keep your coco plums within easy reach. Not only will this keep them fresh, but it will also add a touch of charm to your kitchen space.
If you’re dealing with a larger harvest, here’s a simple guide to help you manage your bounty:
- Immediately after picking: Place coco plums in a paper bag. This can help to contain any moisture and prevent spoilage.
- For short-term storage: Keep them in the refrigerator crisper drawer.
- For long-term storage: Freeze the plums after washing and drying them thoroughly. They can be frozen whole or sliced, depending on your preference.
Frequently Asked Questions
How often should I water my Coco Plum plant?
Water your Coco Plum plant when the top inch of soil feels dry to the touch.
When is the best time to prune my Coco Plum plant?
Prune your Coco Plum plant in late winter or early spring before new growth begins.
What type of fertilizer should I use for my Coco Plum plant?
Use a balanced fertilizer with equal parts nitrogen, phosphorus, and potassium for your Coco Plum plant.
How can I prevent pests from attacking my Coco Plum plant?
Regularly inspect your plant for pests, and use organic pest control methods like neem oil or insecticidal soap.
How do I know when Coco Plums are ripe and ready to harvest?
Coco Plums are ripe when they turn from green to a deep purple color and feel slightly soft to the touch.
How should I store harvested Coco Plums?
Store harvested Coco Plums in a cool, dry place or refrigerate them for longer shelf life.