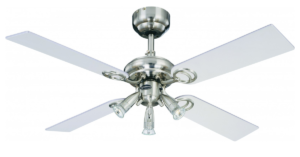
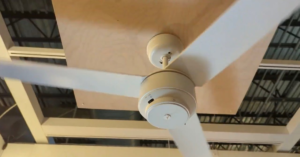
When summer is in full swing, we all need some ceiling fans to make it more refreshing. It is one of the best upgrades you can make to your home. IKEA Ceiling fans are cheap and affordable, making them a great choice for a DIY project.
How to choose a ceiling fan? Well, we have some ideas and instructions for that as well. There are different styles and configurations. The first question many people ask is how many blades a ceiling fan should have.
Let’s discuss.
Ceiling Fan blades
As most of us know, ceiling fan blades impact the quality and performance of a fan. Yet, advancements in residential ceiling fan design have made them equally efficient.

So, no matter whether you choose 3, 4, or 5 blades, you can expect great performance from your ceiling fans. These blades, however, impact the aesthetics of your home. And every space has different cool needs. Here are some things you need to know.
– For starters, fewer blades result in less drag. It is less taxing on the motor, meaning the motor can go faster and more air more efficiently. The result is more airflow, and a better wind chill effect. Your home will feel cooler
– A fan with fewer blades turns faster with a stronger motor, creating a greater wind chill effect
– Fans with more blades are known to be a quitter and better balanced. The result is less ambient noise
Types of ceiling fans
Generally speaking, there are 3 blade ceiling fans and 4 blade ceiling fans.
The former is kinder on the hip pocket. They are more aesthetically pleasing, have higher speed, and come with fewer parts. That means they require less energy to rotate.
But the most important thing comes for your bank account. 3 blades ceiling fans do not need as much energy, so you will pay less on your energy bill. Yet, these can be noisier than ceiling fans with more blades. These ceiling fans are better suited for industrial or workplace needs.
The 4 blade ceiling fans are less noisy, and useful in rooms with an air conditioner. They move the cool air around. And they are more stylish looking. The downside is they move air slower than a 3 blade fan. They are more expensive, and spend more energy, resulting in a higher energy price tag.
What do you need to know before buying ceiling fans?
Let’s take a look at a few important notes before you run to any store, including an IKEA shop to buy ceiling fans. Here are a few important notes.
- There is no one-size-fits-all ceiling fan. You have to consider the size of your room. If the fan is too big for the bedroom, it will look silly, and a small one will not move enough air to be effective. For your information, fan size refers to the diameter of the span of the blades
- Keep your fan circulating. As we said before, fan blades determine how much air is circulated. The more space there is between the blades, the more air mass the blades can push down
- Ideally, your fan should be in the center of the room for best air circulation. But what about the height? It should hang about 9 feet above the floor. If you have a higher ceiling, you can hang the fan on a long stem. But if your ceiling is higher than 14 feet, then keep the fan closer to the ceiling, for example, 3 feet from the ceiling
- Some ceiling fans offer indirect lighting and familiar light at the bottom of the fan. Indirect light is softer, which makes it appropriate for a living room. Bright lighting is usually better suited for the bathroom and kitchen. Dining rooms and bedrooms work best with subdued lighting
IKEA Ceiling fans hack
Now that we know everything about ceiling fans, let’s talk about some hacks and tips you can try. IKEA ceiling fans are amazing products for a DIY project. They are cheap, and quite versatile if you have the time and skill to do a DIY project.
Let’s be honest, most ceiling fans can be ugly. And nobody wants ugly interior design furniture pieces, right?
So, today, we will take a look at a do-it-yourself project with a standard white ceiling fan in your room. With this hack, you can turn your ceiling fan into an amazingly-looking chandelier. If you happen to purchase a chandelier as well from IKEA, you are better suited for this ceiling light project.
- 1 Start by removing the chandelier from the bulb set up and then put it in a box in the basement
- 2 Then, tie 3 equal lengths of strong monofilament, which is basically a fishing line, to the metal ring that the bulb used to hang from. Cut the monofilament, or the fishing line, to about 9 inches. When knotted, you will have 4 inch long loops to work with
- 3 Now, onto the ceiling fan. Remove the ugly globe from the ceiling and put it in the basement with the other half of the chandelier set up. After all, you will not need them anymore. If you like, you can throw them away. Unscrew the light bulb and hung the three loops of monofilament from the screws designed to hold the globe in place

- 4 Put the light bulb back in place in the socket but make sure that the weight of the chandelier hangs from the monofilament, not from the bulb. It will take a bit of time to adjust, but it will be easy to do by shortening the loops a bit
- 5 There you have, a chandelier made with a ceiling fan. If you saw this product at IKEA, it would probably be too heavy and unattractive. But when you make it on your own, you can add a bit of flair and fancy details
IKEA Ceiling fan with lamp hack
Here is another hack you can try with your IKEA ceiling fans. For this hack, all you need is a ceiling fan and Fillsta pendant lamp.
- 1 Start by completely removing the original light kit from the ceiling fan
- 2 Assemble the Fillsta pendant lamb according to directions, only using the pendant itself, the light cord, and the plastic mounting bracket
- 3 Then, you have to do some magic. Hardwire Fillsta and fan together by using the mounting plate from the original light kit that came with the fan. This way, the pendant will not hang only by the light bulb.
